
 Abdul Basit
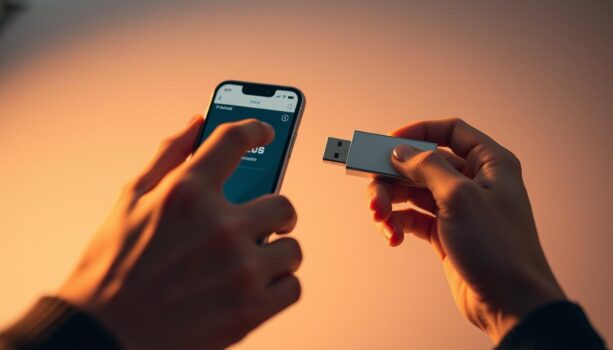
Want to save iPhone photos to a flash drive? For most people, the safest way is to connect the iPhone to a Windows PC or Mac, copy or import the photos, and then paste them into the USB drive. If you have a USB-C iPhone, you can also connect a compatible USB-C flash drive and save selected photos directly through the Files app.
This guide explains how to transfer iPhone photos to a flash drive, USB stick, or pendrive with or without a computer. It also covers iCloud Photos, Lightning iPhones, HEIC/JPEG format issues, USB drive problems, and common fixes when photos do not appear on your PC or iPhone.
Best Method by iPhone Type
| Your iPhone or setup | Best method |
|---|---|
| iPhone with USB-C | Use a USB-C flash drive and Files app |
| Older Lightning iPhone | Use a Lightning to USB adapter or iPhone-compatible flash drive |
| Windows PC available | Use File Explorer or Windows Photos app |
| Mac available | Use Photos app or Image Capture |
| iCloud Photos enabled | Download originals first, then copy to USB |
| Many HEIC photos | Transfer first, then convert to JPEG if needed |
| USB drive not showing | Format USB as exFAT or FAT32 |
How to Transfer Photos from iPhone to USB
There are three main ways to transfer photos from iPhone to USB:
| Method | Best for |
|---|---|
| Windows PC or Mac | Most users and large photo libraries |
| Direct USB-C flash drive | iPhone with USB-C and no computer |
| Lightning adapter | Older iPhones without a computer |
For most users, the safest method is to use a computer first. This gives you more control and lets you check the photos before copying them to the USB drive.
What You Need Before Transferring iPhone Photos to USB
Before starting, check these items:
- A USB flash drive with enough storage
- A working iPhone data cable
- A Windows PC, Mac, or compatible USB-C flash drive
- A Lightning to USB adapter for older iPhones
- Enough battery on your iPhone
- A USB drive formatted as exFAT or FAT32
Some iPhone cables only charge the phone and do not transfer data. If your iPhone does not appear on your computer, try another cable and make sure the iPhone is unlocked.
Method 1: Save iPhone Photos to Flash Drive Using Windows PC
This is the best method for most users because it works with both Lightning and USB-C iPhones. You can copy photos from the iPhone DCIM folder and paste them into your USB flash drive.
Before starting, unlock your iPhone and tap Trust This Computer if the message appears. On some Windows PCs, you may also need the Apple Devices app, iTunes support, or the updated Windows Photos app before the iPhone imports correctly.
Steps
- Connect your iPhone to your Windows PC using a USB cable.
- Unlock your iPhone.
- Tap Trust This Computer if the message appears.
- Open File Explorer on your PC.
- Click This PC.
- Open your iPhone from the device list.
- Go to Internal Storage > DCIM.
- Open the photo folders.
- Select the photos and videos you want to copy.
- Right-click and choose Copy.
- Insert your USB flash drive into the computer.
- Open the USB drive folder.
- Right-click and choose Paste.
This method is useful when you want to move many photos or videos from iPhone to a flash drive. It also lets you check the files before copying them to the USB drive.
Important note: If the DCIM folder is empty or only some photos appear, your photos may be stored in iCloud. Download the original photos first, then try the transfer again.
Best for
- Windows 10 or Windows 11 users
- Large photo libraries
- iPhones with Lightning or USB-C
- Users who want a simple copy-and-paste method
Method 2: Transfer Photos from iPhone to USB Using Windows Photos App
The Windows Photos app is another easy way to import iPhone photos first, then copy them to your USB flash drive.
Steps
- Connect your iPhone to your Windows PC.
- Unlock your iPhone and tap Trust This Computer.
- Open the Photos app on Windows.
- Click Import.
- Choose your iPhone.
- Select the photos you want to import.
- Save them to your computer.
- Insert your USB flash drive.
- Copy the imported photos to the USB drive.
This method is helpful if File Explorer does not show all photos clearly. It is also easier for beginners because you can see photo thumbnails before importing.
If your photos are stored in iCloud, make sure the original full-resolution photos are downloaded before importing. Otherwise, some photos may not appear properly on your PC.
Best for
- Beginners
- Users who want to select photos visually
- PCs where DCIM folders are confusing
- Users who want to import first and then copy to USB
Method 3: Save iPhone Photos to Flash Drive Using Mac
If you use a Mac, you can import photos from your iPhone and then copy them to your USB flash drive.
Steps
- Connect your iPhone to your Mac.
- Unlock your iPhone.
- Open the Photos app or Image Capture.
- Select your iPhone from the device list.
- Choose the photos and videos you want to import.
- Import them to your Mac.
- Connect your USB flash drive to the Mac.
- Open Finder.
- Copy the imported photos to the USB drive.
For large transfers, Image Capture can be a good option because it is direct and simple. It lets you choose where to save your photos.
Best for
- Mac users
- Users who want to import photos first
- Large photo and video transfers
- Users who want better control over folders
Method 4: Transfer Photos from iPhone to USB Stick Without Computer
If you want to transfer photos from iPhone to a USB stick without a computer, the method depends on your iPhone port.
If you have a USB-C iPhone, use a compatible USB-C flash drive. If you have an older Lightning iPhone, use a Lightning to USB adapter or an iPhone-compatible flash drive.
Steps for USB-C iPhone
- Connect a compatible USB-C flash drive to your iPhone.
- Open the Photos app.
- Select the photos and videos you want to transfer.
- Tap the Share button.
- Choose Save to Files.
- Select your USB flash drive.
- Tap Save.
This is one of the easiest laptop-free methods for USB-C iPhones. For best results, use a USB flash drive with one data partition and a supported format such as exFAT, FAT32, FAT, or APFS. Some large external drives may need more power than the iPhone can provide, so a normal USB-C flash drive is usually easier.
Best for
- USB-C iPhones
- Quick photo backup
- Users without a laptop
- Small or medium photo transfers
Method 5: Transfer Photos from Lightning iPhone to USB Without Computer
If you have an older iPhone with a Lightning port, direct USB transfer usually requires a Lightning to USB adapter or an iPhone-compatible flash drive.
Steps
- Connect the Lightning to USB adapter to your iPhone.
- Connect your USB flash drive to the adapter.
- Open the Photos app.
- Select the photos you want to save.
- Tap Share.
- Choose Save to Files.
- Select the connected USB drive.
- Tap Save.
This method is useful when you do not have a computer. However, not every USB stick will work with every adapter. For better results, use a reliable adapter and an exFAT-formatted USB drive.
If the USB drive does not appear in the Files app, try another flash drive, restart your iPhone, or check the drive format on a computer.
Best for
- Older Lightning iPhones
- Users without a computer
- Small photo transfers
- Travel or emergency backup
Method 6: Transfer Photos from iPhone to Pendrive
A pendrive is another name for a USB flash drive or USB stick. The steps are the same.
To transfer photos from iPhone to pendrive, connect your iPhone to a Windows PC or Mac, copy the photos, and paste them into the pendrive. If your iPhone supports direct USB transfer, you can also connect a compatible USB-C pendrive or use a Lightning adapter.
For large videos, use an exFAT-formatted pendrive because FAT32 may not copy files larger than 4GB.
Method 7: Transfer iPhone Photos to USB Using iCloud
If iCloud Photos is enabled, some photos may not be fully stored on your iPhone. This can cause missing photos when you connect your iPhone to a PC or Mac.
In this case, you can download photos from iCloud first and then copy them to your USB flash drive.
Steps
- Open iCloud Photos on your computer.
- Sign in with your Apple ID.
- Select the photos or videos you want.
- Download them to your computer.
- Insert your USB flash drive.
- Copy the downloaded photos to the USB drive.
This method is useful if your photos are already stored in iCloud or your iPhone storage is almost full. However, it depends on your internet speed.
If you want a full phone backup plan before moving photos, read our guide on Best iPhone Data Backup Software in Pakistan.
Best for
- iCloud Photos users
- Users with low iPhone storage
- Users who cannot see all photos in DCIM
- Users who want to download selected photos from cloud storage
Method 8: Use iPhone Transfer Software for Easier Backup
Free methods are enough for most users. But iPhone transfer software can help when you want to move many photos quickly or when Windows does not show your iPhone photos properly.
You may use iPhone transfer software when:
- You want to transfer thousands of photos at once
- Your iPhone photos are not showing in File Explorer
- You want to convert HEIC photos to JPEG
- You want to move photos, videos, contacts, or other files
- You want a full iPhone backup, not only photo transfer
One option is EaseUS MobiMover for iPhone. It can help users transfer iPhone files, back up data, and manage photos more easily.
For normal photo transfer, try the free Windows, Mac, iCloud, or direct USB methods first. Use transfer software only if you need bulk transfer, easier file management, HEIC/JPEG control, or a full iPhone backup workflow.
Why Are iPhone Photos Not Showing on PC or USB?
Sometimes your iPhone connects to the computer, but photos do not appear. This can happen because of iCloud settings, cable issues, permission problems, unsupported formats, or an outdated import app.
Common reasons include:
- Your iPhone is locked
- You did not tap Trust This Computer
- The cable only supports charging
- Photos are stored in iCloud, not fully downloaded on the iPhone
- The DCIM folder is not loading properly
- Windows Photos app needs an update
- Apple Devices or iTunes support is missing on Windows
- The USB drive format is not supported
Fix
Unlock your iPhone, tap Trust This Computer, use a proper data cable, and check your iCloud Photos settings. If iCloud Photos is enabled, make sure the original photos are downloaded before transferring.
If Windows still does not show the iPhone correctly, update Windows, update the Photos app, or install Apple Devices/iTunes support from the Microsoft Store.
How to Fix USB Drive Not Showing on iPhone
If your USB flash drive does not appear in the Files app, the problem may be the drive format, adapter, partition setup, or power requirement.
Try these fixes:
- Format the USB drive as exFAT or FAT32
- Make sure the drive has only one data partition
- Try another USB flash drive
- Use a reliable iPhone-compatible adapter
- Restart your iPhone
- Open the Files app and tap Browse
- Check if the USB drive needs extra power
- Avoid damaged or very old USB drives
For large videos, exFAT is usually better than FAT32 because FAT32 has a 4GB file size limit.
HEIC vs JPEG: Which Format Is Better for USB Backup?
iPhones often save photos in HEIC format. HEIC saves storage space and keeps good image quality, but some older computers, TVs, photo frames, and software may not open HEIC files easily.
JPEG is more compatible with most devices.
If you want future iPhone photos to save in a more compatible format:
- Open Settings on your iPhone.
- Go to Camera.
- Tap Formats.
- Choose Most Compatible.
This setting saves new photos in JPEG format. Existing HEIC photos may still need conversion if you want to use them on older devices.
If you want to keep the original file format during transfer, check your iPhone photo transfer settings before importing. This helps avoid confusion when Windows or another device changes the file format during import.
Best USB Format for iPhone Photos
The best USB format for iPhone photo transfer is usually exFAT. It works well for large photos and videos and is more suitable than FAT32 when you have large video files.
| USB format | Good for | Limitation |
|---|---|---|
| exFAT | Large photos and videos | Best general option |
| FAT32 | Basic photo transfer | Cannot copy files over 4GB |
| FAT | Older basic drives | Limited for modern storage |
| APFS | Apple devices | Not ideal for Windows sharing |
| NTFS | Windows storage | May not work properly with iPhone |
For most users, choose exFAT before transferring iPhone photos to USB.
Why Save iPhone Photos to a USB Flash Drive?
Saving iPhone photos to a USB flash drive is useful for storage, backup, and sharing.
Free Up iPhone Storage
Photos and videos can quickly fill your iPhone storage. Moving them to a USB drive helps create space for apps, updates, and new photos.
Keep an Offline Backup
A USB drive gives you an offline backup. This can help if your iPhone is lost, damaged, or accidentally reset.
Save iCloud Space
If your iCloud storage is full, moving photos to a USB drive can reduce your need for extra cloud storage.
Share Photos Easily
A USB flash drive makes it easier to share photos with family, friends, or another computer.
Best Practices Before and After Transfer
Before transferring photos, follow a few simple steps to avoid errors.
Before Transfer
- Charge your iPhone
- Use a reliable data cable
- Check USB storage space
- Make sure important photos are downloaded from iCloud
- Transfer in smaller batches if you have many files
- Create folders by year, event, or family name
After Transfer
- Open the USB drive and check the copied photos
- Test a few videos to make sure they play
- Do not delete iPhone photos until the USB copy is confirmed
- Keep another backup for important memories
- Store the USB flash drive safely
A USB drive is useful, but it can fail. For important family photos, keep at least two backups.
Common Problems and Fixes
| Problem | Possible reason | Fix |
|---|---|---|
| iPhone not showing on PC | Phone locked or not trusted | Unlock iPhone and tap Trust This Computer |
| DCIM folder empty | Photos stored in iCloud | Download originals first |
| USB not showing on iPhone | Unsupported format, partition, or adapter issue | Format as exFAT or FAT32 and use one partition |
| Transfer is slow | Too many files or slow USB drive | Transfer in smaller batches |
| HEIC photos not opening | Device does not support HEIC | Convert to JPEG |
| Large video not copying | FAT32 file size limit | Use exFAT |
| Photos duplicated | Imported more than once | Sort by date and file name |
If photos disappear from the USB drive or are deleted by mistake, avoid formatting the drive first. You can check BreTech’s photo recovery tools before trying recovery.
Safety Tip: Do Not Delete Photos Too Quickly
After copying photos to a USB flash drive, open the USB drive and check the files. Make sure your important photos and videos are working before deleting anything from your iPhone.
Test a few photos and videos, especially large files. For important family photos, keep at least two backups, such as one USB drive and one computer or cloud backup.
If photos are missing, deleted, or damaged, stop using the USB drive until you decide the next step. This reduces the chance of overwriting recoverable files.
Useful Tools for Managing Photos After Transfer
After transferring photos to USB, you may want to rename files, sort folders, remove duplicates, or organise photos by year, event, or family name. This makes your backup easier to search later.
You can check BreTech’s file management tools if you need software for organising, managing, or handling files after transfer.
FAQs
Q: How do I save iPhone photos to a USB flash drive?
A: Connect your iPhone to a Windows PC or Mac, unlock it, allow access, copy the photos, and paste them into your USB flash drive. If your iPhone has USB-C, you can also connect a compatible USB-C flash drive directly and use Save to Files.
Q: Can I transfer iPhone photos to USB without a computer?
A: Yes. If you have a USB-C iPhone, connect a compatible USB-C flash drive and use the Files app. If you have a Lightning iPhone, use a Lightning to USB adapter or an iPhone-compatible flash drive.
Q: What is the easiest way to transfer photos from iPhone to USB?
A: The easiest way is to use a Windows PC or Mac. Connect your iPhone, tap Trust This Computer, copy the photos, and paste them into the USB flash drive.
Q: How do I transfer photos from iPhone to flash drive?
A: You can transfer photos from iPhone to a flash drive by using a Windows PC, Mac, direct USB-C flash drive, or Lightning adapter. The easiest method is to copy the photos on your computer and paste them into the flash drive.
Q: How do I transfer photos from iPhone to USB stick without computer?
A: Use a compatible USB-C flash drive if your iPhone has USB-C. For a Lightning iPhone, use a Lightning to USB adapter or an iPhone-compatible flash drive. Then select photos, tap Share, choose Save to Files, and select the USB stick.
Q: How do I transfer photos from iPhone to pendrive?
A: Connect your iPhone to a computer, copy the photos, and paste them into the pendrive. If your iPhone supports direct USB transfer, you can also use a compatible USB-C pendrive or a Lightning adapter.
Q: Why are my iPhone photos not showing on my PC?
A: Your photos may be stored in iCloud, your iPhone may be locked, your computer may not be trusted, or Windows may need updated Apple support. Unlock your iPhone, tap Trust This Computer, and make sure iCloud originals are downloaded before transferring.
Q: Why is my USB drive not showing in the iPhone Files app?
A: The USB drive may be in an unsupported format, may have more than one partition, may need more power, or may not work with your adapter. Try formatting the USB drive as exFAT, use another flash drive, or try a better iPhone-compatible adapter.
Q: What USB format works best for iPhone photo transfer?
A: exFAT is usually the best format because it supports large photos and videos. FAT32 can also work, but it cannot copy files larger than 4GB.
Q: Can I transfer videos from iPhone to USB too?
A: Yes. You can transfer both photos and videos from iPhone to USB. For large videos, use an exFAT-formatted USB drive to avoid file size problems.
Q: Should I convert HEIC photos to JPEG before copying to USB?
A: Not always. HEIC is fine if your devices support it. But if you want better compatibility with older computers, TVs, photo frames, or editing software, JPEG is usually better.
Q: Do I need special software to transfer iPhone photos to USB?
A: No. You can use Windows File Explorer, Windows Photos app, Mac Photos app, Image Capture, iCloud, or the Files app. Software is only useful if you need bulk transfer, HEIC to JPEG conversion, or full iPhone backup features.
Final Thoughts
Saving iPhone photos to a USB flash drive is one of the easiest ways to free up storage, protect your memories, and keep an offline backup. For most users, the safest method is to connect the iPhone to a Windows PC or Mac, copy the photos, and paste them into the USB drive.
If you have a USB-C iPhone, direct transfer to a compatible USB-C flash drive can also work well. For older Lightning iPhones, use a compatible adapter or an iPhone-supported flash drive.
Before deleting anything from your iPhone, always check that your photos and videos have copied correctly to the USB drive. For important memories, keep more than one backup.
Related BreTech Guides
- How to Recover Deleted Photos from SD Cards
- Best Mobile Data Recovery Software in Pakistan
- How to Prevent Accidental File Deletion in Pakistan
Want more simple guides for organising, backing up, and managing your files? Explore more helpful articles in our File Management blog category.


